
How Much Does It Cost to Re-Drywall a 2,000-Square-Foot House?
In Brampton and Mississauga, re-drywalling a 2,000-square-foot house typically costs about $16,000 to $24,000 for a substantial whole-house project.
That range may include removing and disposing of the existing drywall, preparing the framing, installing new drywall on walls and ceilings, taping and mudding, finishing corners, sanding, and preparing the surfaces for primer and paint.
Older homes with water damage, uneven framing, multiple layers of drywall, difficult ceilings, or extensive repairs can cost $22,000 to $25,000 or more.
The important thing to understand is that a 2,000-square-foot home does not contain exactly 2,000 square feet of drywall. The house size refers to the floor area. The actual drywall quantity depends on the number of rooms, wall lengths, ceiling heights, ceilings, closets, hallways, stairwells, bulkheads, windows, doors, and other details.
<h2>Typical Re-Drywalling Cost in Brampton and Mississauga</h2>
From my experience working as a Brampton handyman, I would use the following ranges for initial planning:
- Straightforward whole-house re-drywalling: $16,000–$19,000.
- Typical older-home re-drywalling: $19,000–$24,000.
- Extensive demolition, ceiling repairs, water damage, difficult access, or framing problems: $22,000–$25,000 or more.
These are planning ranges, not guaranteed prices. The final cost should come from an inspection and a detailed written scope of work.
A house with easy access, good framing, limited demolition, standard drywall, and a normal Level 4-type finish should fall closer to the lower or middle part of the range.
An older Brampton or Mississauga home with extensive demolition, water damage, insulation concerns, high ceilings, complicated room layouts, or ceilings requiring substantial repair can quickly move toward the upper end.
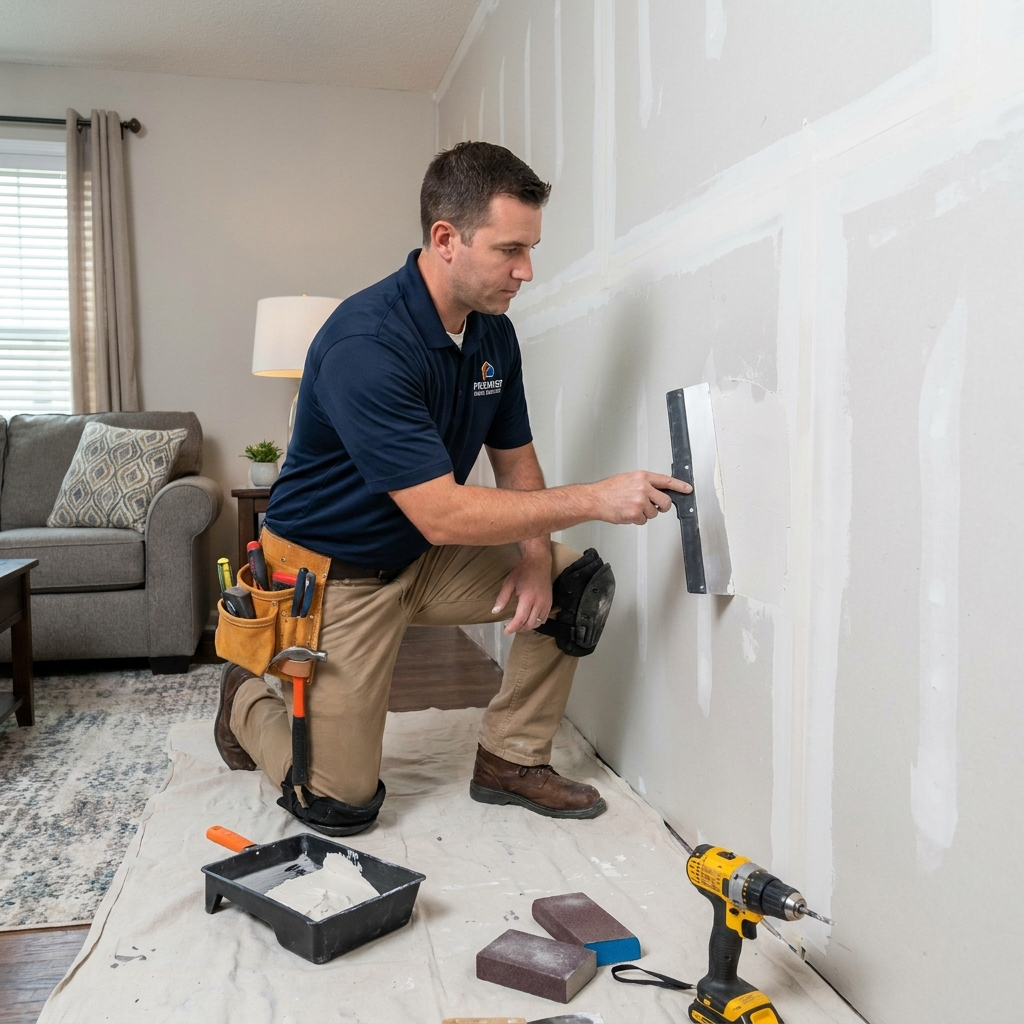
Cost Breakdown for a 2,000-Square-Foot House
The following estimates show how the total cost may be divided between the major stages of a whole-house re-drywalling project.
Demolition and disposal: $2,000–$3,500
This includes removing the old drywall, loading it out, cleaning the work areas, and disposing of the debris.
Homeowners often underestimate this stage. Removing drywall from an entire house creates a surprising amount of waste, particularly when there are multiple layers, glued sheets, difficult stair access, or limited space for loading debris.
The cost may increase when the drywall is difficult to remove without damaging the framing, when materials must be carried through narrow hallways or stairs, or when the disposal vehicle cannot be parked close to the house.
Drywall materials: $3,000–$4,500
Drywall materials may include:
- Drywall sheets.
- Screws and fasteners.
- Joint tape.
- Joint compound.
- Corner bead.
- Access panels.
- Drywall accessories.
- Moisture-resistant board for appropriate bathroom areas.
- Thicker or specialty board for certain ceilings or locations.
The drywall sheets are only one part of the material cost. Different parts of the home may require different products. Moisture-prone rooms, ceilings, bulkheads, and areas with special fire or sound-control requirements can affect the final price.
Drywall installation: $3,500–$5,000
Installation labour includes measuring, cutting, carrying, fitting, and fastening the drywall.
A simple open layout is generally faster to board than a home with many small rooms, closets, angles, stairwells, bulkheads, alcoves, and awkward ceiling areas.
The installer also has to cut and fit the drywall around doors, windows, electrical boxes, plumbing penetrations, vents, and other obstacles. Each detail adds time to the project.
Ceilings often require more labour than straightforward walls because of overhead work, board handling, framing conditions, and the importance of keeping joints and transitions consistent.
Taping and mudding: $3,000–$4,500
Taping and mudding is one of the largest parts of the project. It should not be treated as a minor finishing step.
This stage may include:
- Embedding drywall tape.
- Applying multiple coats of joint compound.
- Finishing inside and outside corners.
- Coating fastener heads.
- Installing and finishing corner bead.
- Blending repairs into surrounding surfaces.
- Preparing joints and transitions for sanding.
On a whole-house project, the quality of this work has a major effect on the finished appearance. Two contractors can install similar drywall but produce very different results depending on how carefully they handle the joints, corners, ceiling transitions, and surface preparation.
Sanding: $1,000–$2,000
Sanding is often overlooked when homeowners compare quotes.
A good paint-ready surface requires more than applying compound and leaving visible ridges, tool marks, or uneven transitions. Sanding may need to be followed by inspection, touch-ups, and additional sanding.
Ceilings and areas exposed to strong natural or artificial light can be particularly unforgiving because imperfections are easier to see.
Ceiling repairs and additional ceiling work: $1,000–$2,500
Ceiling work varies considerably from one house to another.
A flat ceiling with solid framing may require relatively little extra work. A damaged, uneven, high, or poorly framed ceiling can require substantial preparation before the new drywall is installed.
Additional ceiling costs may result from:
- Damaged or inadequate framing.
- Previous ceiling repairs.
- Bulkheads and recessed areas.
- High ceilings.
- Uneven transitions.
- Cracks or movement.
- Water-damaged sections.
- Difficult access for board installation and finishing.
Several ceilings on one of my larger projects needed to be repaired rather than simply boarded over. We first had to make sure the framing and existing surfaces were solid. That extra preparation added time, but it was necessary to produce a uniform finished result.
Final preparation for paint: $500–$1,500
Final preparation may include filling small imperfections, completing touch-ups, cleaning the surfaces, and ensuring the drywall is ready for primer.
The quote should clearly state whether primer and painting are included. Many drywall contractors prepare the surfaces for primer but do not apply primer or finish paint unless those services are specifically included.
My 2,400-Square-Foot Brampton Case Study
One of the largest whole-house drywall projects I have worked on was a roughly 2,400-square-foot detached home in Brampton.
The homeowners were essentially starting over with the drywall after extensive interior damage and years of previous repairs.
The scope included removing most of the existing drywall throughout the main and upper floors, disposing of the old material, repairing and preparing the framing, and installing new drywall on the walls and ceilings.
The finishing work included:
- Taping and mudding all joints.
- Finishing inside and outside corners.
- Sanding the walls and ceilings.
- Repairing several ceilings.
- Preparing the surfaces for primer and paint.
- Checking wall cavities and insulation before closing the walls.
The total project came in at approximately $20,000 to $25,000, depending on the final finishing and repair work.
What made the project more expensive was not simply the amount of drywall. Demolition and disposal added significantly to the work, as did uneven framing and previous patchwork.
Some ceilings had noticeable imperfections, so installing new board alone would not have produced a good result. We had to confirm that the existing surfaces and framing were solid before proceeding.
In some areas, insulation and wall cavities also needed to be checked before the new drywall went up.
The biggest lesson from that project is that whole-house drywall pricing is not really a “cost per sheet” calculation. Two homes with the same floor area can have very different prices.
What Affects the Re-Drywalling Price?
Demolition requirements
Removing one accessible layer of drywall is very different from removing multiple layers that have been glued, heavily patched, or damaged.
The contractor may also need to protect floors, stairs, doors, windows, cabinets, and other finishes during demolition. Loading and disposal conditions can affect the labour just as much as the removal itself.
Framing condition
New drywall should not be used to hide serious framing problems.
Uneven, damaged, twisted, or poorly spaced framing may need to be repaired or adjusted before the board is installed. If the old drywall is removed and the framing is exposed, the contractor may discover conditions that were not visible during the initial inspection.
Those conditions should be explained and priced through a written change order.
Water damage and moisture problems
If drywall has been damaged by water, the source of the moisture must be corrected before replacement.
Possible causes include:
- Plumbing leaks.
- Roof leaks.
- Window leaks.
- Foundation or basement moisture.
- Condensation.
- Poor exterior drainage.
- Bathroom ventilation problems.
Replacing stained drywall without fixing the leak is not a permanent repair. The same problem may return behind the new board.
Insulation, electrical, and plumbing work
Once walls are open, homeowners sometimes decide to replace insulation, move electrical outlets, add lighting, repair plumbing, or make other improvements.
That may be a sensible time to do the work, but it changes the project scope. Electrical and plumbing work should be completed by appropriately qualified professionals, and the drywall estimate should identify whether that work is included or excluded.
Room layout and ceiling height
A home with open rectangular rooms is generally easier to board and finish than one with many small rooms and complicated details.
Costs can increase with:
- High ceilings.
- Stairwells.
- Narrow hallways.
- Bulkheads.
- Recessed areas.
- Many closets.
- Arched or angled openings.
- Numerous windows and doors.
- Difficult material access.
- Limited parking or loading space.
Drywall type
Standard drywall may be suitable for many rooms, but other areas may require or benefit from different products.
Bathrooms and other moisture-prone areas may need an appropriate moisture-resistant or water-resistant drywall system. Ceilings may require a different thickness or installation approach depending on the framing and project requirements.
Specialty materials can increase both material and labour costs.
Finish level
The phrase “ready for paint” needs to be explained in the estimate. It can mean different things to different contractors and homeowners.
Level 4 is commonly used for smooth residential surfaces receiving flat, eggshell, or similar paint finishes. It involves properly finished joints, fasteners, angles, and accessories, followed by sanding. Level 5 adds a thin skim coat over the entire surface and is intended for areas where strong lighting, dark colours, or glossy paint may reveal minor surface variations.usg+1
If you want smooth walls and ceilings with a high-quality paint finish, taping, mudding, sanding, and final preparation can represent a substantial portion of the labour.
That is often where homeowners underestimate the cost.
Does Your House Need All New Drywall?
My personal rule is simple: if the drywall is still solid, dry, and properly attached, I would repair it before recommending full replacement.
Age by itself is not a good enough reason to tear out serviceable drywall.
If a Brampton or Mississauga home has a few nail pops, settlement cracks, damaged corners, or isolated holes, patching and repairing those areas may be the most sensible option.
There is no reason to spend tens of thousands of dollars replacing perfectly good drywall because of a handful of cosmetic problems.
When repair may be enough
Repair is often appropriate when the damage is limited to:
- A few nail pops.
- Isolated holes.
- Minor settlement cracks.
- Damaged corners.
- Small patches from plumbing or electrical access.
- A limited number of previous repairs.
- Surface imperfections that can be corrected during preparation.
If the underlying drywall is sound, proper repairs followed by primer and quality paint can significantly improve the appearance for much less than full replacement.
When partial replacement may be better
Partial replacement can be a practical compromise when several areas are damaged but most of the house remains sound.
The damaged sections can be removed and replaced, then taped and finished so they blend with the surrounding surfaces. This can save a homeowner a substantial amount compared with gutting the entire house.
When full replacement may make sense
I start considering extensive replacement when the drywall has lost its integrity or the damage is widespread.
Examples include:
- Extensive water damage across multiple rooms.
- Soft, swollen, crumbling, or delaminating drywall.
- Significant mould or contamination.
- Multiple layers of old or poorly installed drywall.
- Large areas of repeated cracking and failed repairs.
- Loose drywall throughout the house.
- Major renovation work requiring walls and ceilings to be opened.
- Extensive flood damage.
- Surfaces so uneven that patching would produce a poor result.
Covering existing drywall with a new layer should only be considered when the old material is dry, firmly attached, and reasonably flat.
If the old drywall is loose, mouldy, damaged, or hiding a moisture problem, covering it only hides the issue.
Safety Issues Before Demolition
Before demolition begins, I would inspect for water damage, mould, insulation problems, electrical and plumbing issues, and any potential asbestos-containing materials.
If asbestos is suspected, I would not treat the work as ordinary handyman demolition. Ontario has specific requirements governing asbestos on construction projects, including repair, alteration, maintenance, and demolition activities.ontario
The appropriate approach may involve assessment, testing, containment, specialized removal, and clearance procedures depending on the material and scope.
Do not disturb suspicious materials simply to obtain a quicker drywall estimate.
Mould and major moisture damage also need proper assessment. The visible drywall may be only part of the problem, and replacing it without addressing the underlying cause can lead to another failure.
How to Compare Drywall Quotes
The cheapest quote is not automatically the best deal. With whole-house re-drywalling, I would compare exactly what each contractor includes rather than comparing only the total price.
A quote that is dramatically lower than the others may have left out demolition, disposal, ceiling work, multiple coats of compound, proper sanding, or final preparation.
Sometimes a low initial number is simply an estimate to get the project started, with additional charges appearing after the drywall is removed.
Ask the contractor:
- Does the price include complete removal of the existing drywall?
- Is all demolition debris and disposal included?
- How many new drywall sheets are included?
- What thickness and type of drywall will be used?
- Are appropriate products included for bathrooms and moisture-prone areas?
- Is installation labour included around doors, windows, electrical boxes, and obstacles?
- How many coats of joint compound are included?
- What finish level is included?
- Is sanding included?
- Are ceilings included at the same price as walls?
- Are corner bead, screws, tape, compound, cleanup, and disposal included?
- Are primer and painting included or excluded?
- What happens if damaged framing, insulation, water damage, or mould is found?
- Are there allowances or exclusions that could become change orders?
- How must additional work be approved?
One of the biggest red flags is a quote that simply says “complete drywall — $X” without explaining the scope.
If one quote is $17,000 and another is $23,000, do not immediately assume the lower-priced contractor is saving you $6,000. Find out what the more expensive quote includes that the cheaper quote does not.
Sometimes the more expensive quote is the more complete and predictable option.
Information to Give Your Contractor
A contractor can prepare a more accurate estimate when you provide details beyond the home’s total floor area.
A professional floor plan is not necessary. A basic sketch or room-by-room list can be enough if it includes approximate dimensions and ceiling heights.
Provide:
- Approximate total house size.
- Number of floors.
- Number of bedrooms and bathrooms.
- Whether the basement is included.
- Approximate room dimensions.
- Ceiling height on each floor.
- Which walls and ceilings require replacement.
- Whether all drywall is being removed or only selected areas.
- Number of rooms with damaged drywall.
- Details of previous water damage or flooding.
- Visible mould, staining, swelling, or soft drywall.
- Whether insulation is being replaced or left in place.
- Planned electrical or plumbing work.
- Whether doors, trim, and baseboards are being removed and reinstalled.
- Desired finish level.
- Desired paint sheen or final appearance.
Photos are also extremely useful, particularly when a contractor cannot inspect the property immediately.
Take wide photos of every room and ceiling, along with close-ups of:
- Cracks.
- Water stains.
- Swollen or soft drywall.
- Damaged corners.
- Holes.
- Previous patches.
- Uneven areas.
- Stairs and hallways.
- Bulkheads.
- High or awkward ceilings.
- Basement walls and ceilings.
If there is water damage, photograph the related exterior area as well. A roofline, window, exterior wall, foundation area, or plumbing location may help identify a possible moisture source.
The reason for the project is also important. “I want new drywall because the house is old” is very different from “the house had a major leak,” “we are renovating the entire interior,” or “the existing drywall has extensive cracking and previous repairs.”
If demolition has already started, photos of the exposed framing can help show damaged studs, insulation problems, plumbing leaks, electrical issues, and other conditions affecting the estimate.
How to Avoid Change Orders
You cannot always eliminate change orders. Hidden conditions may legitimately be discovered after old drywall is removed.
For example, damaged framing, a concealed plumbing leak, mould, missing insulation, or electrical problems may not be visible during the initial inspection.
However, the contractor should explain the issue, provide a price, and obtain approval before proceeding whenever practical.
To reduce surprises:
- Get the complete scope in writing before demolition.
- Identify what is included and excluded.
- Specify the drywall type and thickness.
- Specify whether walls, ceilings, or both are included.
- Agree on the finish level.
- Confirm the number of finishing coats where appropriate.
- Confirm whether sanding and paint preparation are included.
- Confirm disposal and cleanup.
- Ask how hidden damage will be priced.
- Require written approval for additional work.
- Clarify whether primer and painting are included.
My biggest rule for Brampton and Mississauga homeowners is to get the scope in writing before the drywall comes down.
Final Cost Example
For a 2,000-square-foot house requiring substantial whole-house re-drywalling, a realistic planning estimate in the Brampton and Mississauga area might look like this:
- Demolition and disposal: $2,000–$3,500.
- Drywall materials: $3,000–$4,500.
- Drywall installation: $3,500–$5,000.
- Taping and mudding: $3,000–$4,500.
- Sanding: $1,000–$2,000.
- Ceiling repairs and additional ceiling work: $1,000–$2,500.
- Final preparation for paint: $500–$1,500.
These figures should not be treated as seven completely separate fixed charges because some work stages overlap. They are useful for understanding where the project cost comes from.
A straightforward project may fall toward the lower or middle part of the $16,000–$24,000 range. Extensive demolition, ceiling problems, water damage, framing repairs, difficult access, and hidden conditions can push the total toward $25,000 or higher.
Final Answer
The cost to re-drywall a 2,000-square-foot house in Brampton or Mississauga is commonly about $16,000 to $24,000 for a substantial whole-house project.
Difficult homes with extensive demolition, water damage, framing repairs, ceiling problems, mould concerns, multiple layers of drywall, or difficult access may cost $22,000 to $25,000 or more.
Before approving full replacement, determine why the drywall failed. If it is solid, dry, and properly attached, repair may be the better choice. If the damage is widespread, contaminated, structurally affected, or connected to a major renovation, full removal and replacement may be justified.
The best estimate comes from an itemized, inspection-based quote that clearly identifies demolition, disposal, materials, installation, finishing, sanding, ceiling work, exclusions, and the process for approving change orders.