
What Causes Uneven Tile Installation and How to Fix It
If you’ve ever walked across a tiled floor and felt a noticeable bump underfoot, or noticed grout lines that widen and narrow as they cross the room, you’re dealing with uneven tile installation. It’s one of the most common complaints I hear from homeowners across the GTA, from Mississauga to Hamilton, and it’s almost always preventable.
As a Hamilton-based handyman who’s fixed countless tile jobs gone wrong, I can tell you this: uneven tile isn’t usually caused by bad tiles. It’s caused by shortcuts taken before the first tile is ever laid. In this post, I’ll break down the real causes, share a real repair story from my work, and give you the exact steps I use to fix uneven tile—plus the one golden rule that will save you time, money, and frustration.
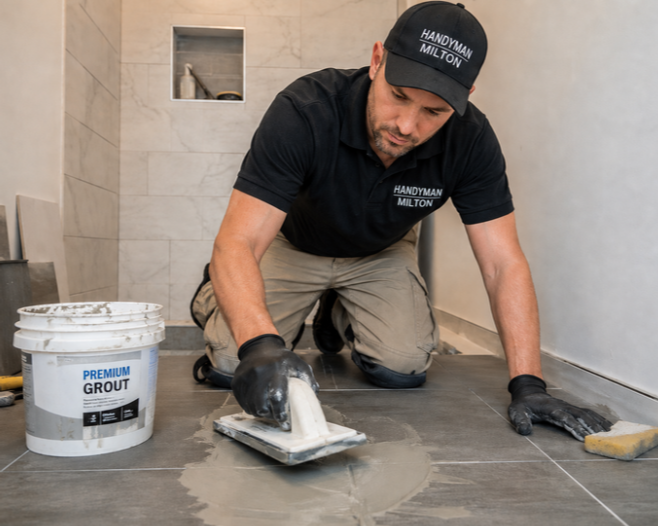
The #1 Cause of Uneven Tile: Poor Substrate Preparation
From my experience working across the GTA, the single biggest cause of uneven tile installation is poor substrate preparation. Homeowners often focus on getting the tiles laid evenly, but if the floor or wall underneath isn’t flat, clean, and properly prepared, the finished tile surface can never be truly level.
I see this especially with floors where there are low spots, old adhesive residue, damaged subflooring, or uneven concrete slabs. Instead of taking the time to correct those issues first, people sometimes try to compensate with extra thin-set mortar. That usually creates inconsistent coverage and leads to lippage where one tile sits higher than the next.
Poor spacing and rushing the installation are also common, particularly with DIY projects. A homeowner may start laying tiles without checking the surface with a long straightedge or level, and small mistakes gradually compound as the installation progresses.
In my opinion, the biggest mistake is treating tile installation as simply a matter of sticking tiles to a surface. The preparation underneath is what determines how flat and professional the finished job will look. I would rather spend extra time preparing and leveling the substrate than try to fix uneven tiles after they have been installed.
A Real-World Fix: My Bathroom Floor Repair in the GTA
One example that stands out was a bathroom floor where the homeowner had already installed the tile, but the finished surface had noticeable high and low spots. Some tiles were sitting higher than others, and the grout lines were becoming increasingly uneven as you moved across the floor.
When I inspected it, I found that the main problem wasn’t the tile itself, it was the substrate underneath. The floor had several low areas that had never been properly levelled before the tile was installed. I used a long level and straightedge to identify the low spots and checked the tile installation in different directions to see where the unevenness was coming from. I could also see that inconsistent thin-set thickness had been used to try to compensate for the uneven floor.
In that situation, simply adding more grout or trying to adjust individual tiles wouldn’t have solved the problem. The proper fix was to remove the affected tile, clean up the old thin-set, and prepare the substrate correctly. I leveled the low areas with the appropriate floor-leveling material, allowed it to cure properly, and then checked the surface again before reinstalling the tile.
When I reset the tiles, I paid close attention to thin-set coverage, spacing, and alignment, using a level and straightedge as I worked rather than waiting until the end to discover problems. After the installation cured, I completed the grouting and cleanup.
The biggest lesson for the homeowner was that tile can only be as flat as the surface underneath it. Trying to save time on substrate preparation usually creates much more work later. In my Hamilton area handyman work, I always tell homeowners that if the floor or wall isn’t properly prepared before the first tile goes down, no amount of careful grouting afterward will make the installation look truly professional.
Other Common Causes of Uneven Tile (Beyond Substrate Issues)
From my experience as a Hamilton handyman working throughout the GTA, there are three other causes I see repeatedly besides an uneven substrate:
- Inconsistent thin-set application – This is a major one. If the adhesive isn’t spread evenly or the tile isn’t properly bedded into it, some tiles can sit higher than others. I explain to homeowners that thin-set isn’t meant to be used like body filler to level out a bad floor. It needs to be applied consistently so each tile has proper support.
- Poor spacing and rushing the layout – When installers don’t take enough time to establish straight reference lines and consistent spacing, small errors can quickly become obvious. One tile may be slightly out of position, and by the time you reach the other side of the room, the grout lines can be noticeably off. I usually tell homeowners that the first few rows set the direction for the entire installation, so taking extra time at the beginning saves a lot of trouble later.
- Warped or slightly bowed tiles – Some larger-format tiles naturally have a small amount of variation, and inexpensive or improperly stored tiles can sometimes be worse. If you don’t account for that during installation, you can end up with noticeable lippage between adjacent tiles. With larger tiles, I pay particular attention to the layout, adhesive coverage, and leveling system where appropriate.
The way I explain all of this to homeowners is pretty simple: “Uneven tile isn’t usually one big mistake, it’s several small mistakes adding up.” Good tile work requires the surface, adhesive, tile placement, spacing, and layout to work together. If you rush any one of those steps, the finished floor or wall will usually show it.
How to Fix Uneven Tile: My Step-by-Step Approach
From my experience as a Hamilton handyman, my approach depends on whether the problem is cosmetic, localized, or caused by a fundamental installation mistake. I don’t believe in trying to hide a serious tile problem with grout or caulk.
Minor Lippage (Around 1–2 mm)
First, I determine whether the difference is within the acceptable tolerance for the tile and installation. If the tiles are firmly bonded and the problem is minor, I usually leave the installation intact rather than creating a bigger problem by removing good tiles. For small edges that are visually noticeable, careful grout work can sometimes make the transition less obvious, but I won’t use grout to compensate for a genuinely bad installation.
Moderate Unevenness Across a Section
If only a small section is affected, I’ll identify exactly which tiles are causing the problem and check what is underneath them. If the tiles haven’t bonded properly or can be removed without damaging surrounding areas, I’ll take out the affected tiles, remove the old thin-set, correct the underlying surface, and reinstall them with proper adhesive coverage and spacing. I use a long level or straightedge constantly during this process.
Severe Unevenness or Widespread Problems
If the entire floor or wall is noticeably uneven, or there are widespread problems with lippage, inconsistent spacing, or poor bonding, I usually recommend removing and redoing the affected area. It can be tempting to try a quick cosmetic fix, but that often just delays the inevitable. If the substrate itself is the problem, it needs to be corrected before new tile goes down.
Some of my go-to tools are a long straightedge, quality level, tile spacers, notched trowels, rubber mallet, tile removal tools, and a proper scraper for removing old thin-set. For larger-format tile, I may also use a tile-leveling system to help control lippage during installation.
My biggest “trick of the trade” is really checking constantly instead of assuming everything is fine until the job is finished. I check the tile from multiple directions with a straightedge, look across the surface under good lighting, and periodically lift a freshly set tile to verify adhesive coverage. Finding a problem while you’re still working is much easier and much cheaper than discovering it after everything has cured.
My Golden Rule for Avoiding Uneven Tile in the GTA
My golden rule for any GTA homeowner is: don’t let anyone start laying tile until the substrate has been checked and properly prepared. The quality of the finished tile job is largely determined before the first tile is ever installed.
If you’re hiring a tile installer, I would specifically ask: “How are you going to check and prepare the surface before installing the tile?” A good installer should be able to explain how they’ll check for low spots, high spots, moisture issues, damaged areas, and whether the existing surface is suitable for tile.
A major red flag is someone who immediately starts spreading thin-set without properly inspecting the floor or wall. Another is a contractor who says they can simply use extra adhesive to compensate for an uneven surface. Thin-set is for bonding tile, not for correcting a badly prepared substrate.
For DIY homeowners, my advice is to slow down at the preparation and layout stages. Use a long straightedge or level to check the surface, establish your reference lines, dry-lay some of the tile, and make sure your spacing and cuts are planned before you start bonding anything.
The money-saving lesson I’ve learned doing handyman work around Hamilton and the GTA is simple: spend more time preparing than you think you need to. Taking an extra hour to identify and correct a problem before installation can save you from spending days and potentially hundreds or thousands of dollars removing and replacing an uneven tile job later.
Final Thoughts: Don’t Skip the Prep Work
Uneven tile installation is frustrating, but it’s almost always preventable with the right approach. Whether you’re hiring a pro or tackling the project yourself, remember this: the substrate is everything. No amount of careful grouting or perfect spacing can fix a floor that wasn’t properly prepared from the start.
If you’re in the GTA and dealing with uneven tile, don’t try to patch it with caulk or ignore it hoping it’ll “settle.” Address the root cause usually the substrate—and you’ll end up with a floor that looks great and lasts for years.
Need help fixing or preventing uneven tile in your Hamilton, Mississauga, or Greater Toronto Area home? Reach out I’ve seen it all, and I’m happy to help you get it right the first time.